
Auto Parts Search

Chevrolet Beretta CAR/TRUCK REPAIR PROCEDURES AND DIAGRAMS - WHAT Chevrolet REPAIR SHOPS DON'T WANT YOU TO KNOW
Learn how to repair a car or truck, install or remove parts, wire an engine, reset warning lights, replace fuel filter, fix auto body and more. Get Automotix DIY!Select Year
| 1996 | 1995 | 1994 | 1993 |
| 1992 | 1991 | 1990 | 1989 |
| 1988 | 1987 |
 Automotix DIY provides automotive consumers and do it yourselfers; the most comprehensive repair information about Chevrolet Beretta car and truck
repair procedures including Chevrolet engine diagrams, wiring diagrams, repair work estimating measures, technical service bulletins, auto body work
guidance, starter & alternator replacement procedures, serpentine belt replacement procedures, radiator & hose replacement procedures, tune-up &
drivability specifications, quick lube illustrations, preventive maintenance guide, engine light reset instructions, parts removal and install
procedures, fuel filter replacement directions, component location diagrams, air filter locations & replacement instructions, a/c
system specifications, and general auto service procedures. You don't have to be a car mechanic or technician to know how to fix
your Chevrolet Beretta automobile. Try the Automotix DIY solution today!
Automotix DIY provides automotive consumers and do it yourselfers; the most comprehensive repair information about Chevrolet Beretta car and truck
repair procedures including Chevrolet engine diagrams, wiring diagrams, repair work estimating measures, technical service bulletins, auto body work
guidance, starter & alternator replacement procedures, serpentine belt replacement procedures, radiator & hose replacement procedures, tune-up &
drivability specifications, quick lube illustrations, preventive maintenance guide, engine light reset instructions, parts removal and install
procedures, fuel filter replacement directions, component location diagrams, air filter locations & replacement instructions, a/c
system specifications, and general auto service procedures. You don't have to be a car mechanic or technician to know how to fix
your Chevrolet Beretta automobile. Try the Automotix DIY solution today!
A/C & HEATER SERVICE PROCEDURES FOR Chevrolet Beretta AUTOMOBILES
Air Conditioner and Heater Service Includes module configuration procedures, general service, maintenance, automatic temperature control, compressor services, electric cooling fans, vacuum diagrams, specifications, and manual air conditioning and heater diagnostics and replacement procedures for domestic and imported Chevrolet Beretta cars and light trucks from 1990+
Cooling Fans -> Passenger Cars Except Saturn -> LEMANS -> COMPONENT REPLACEMENT -> Coolant Fan Does Not Run -> Coolant Fan Does Not Run At Low Speed -> Coolant Fan Runs Constantly When Ignition Switch Is In Run -> Cooling Fan, Replace -> DESCRIPTION -> LESS A/C -> System Diagnosis -> SYSTEM DIAGNOSIS & TESTING -> With A/C
Vehicle: 1992 Chevrolet Beretta GT 3.1 V6 GAS
DESCRIPTION
Less A/C
Cooling fan operation is controlled by an engine temperature switch. When engine temperature reaches 221°F, the switch closes and the fan is energized. As the engine cools, the engine temperature switch opens and the cooling fan stops.
With A/C
Operation of the two-speed cooling fan is controlled by high and low speed cooling fan relays. When the A/C system is turned on, voltage is supplied to the A/C compressor relay, the ECM grounds the compressor relay coil and the low speed fan relay is energized. Voltage is then transferred from fu...
CLICK HERE TO GET FULL ACCESS TO Chevrolet Beretta A/C & HEATER SERVICE PROCEDURES
BRAKE SERVICE PROCEDURES FOR Chevrolet Beretta AUTOMOBILES
Includes anti-lock brakes, disc, drum, power and hydraulic brake services diagnostics and procedures for domestic and imported Chevrolet Beretta cars and light trucks from 1990+.
DISC BRAKES, GENERAL MOTORS -> General Information -> INSPECTION OF CALIPER
Vehicle: 1991 Chevrolet Beretta GTZ 3.1 V6 GAS
Should it become necessary to remove the caliper for installation of new parts, clean all parts in alcohol, wipe dry using lint free cloths, using an air hose to blow out drilled passages and bores. Check dust boots for punctures or tears. If punctures or tears are evident, new boots should be installed upon reassembly.
Inspect piston bores for scoring or pitting. Bores that show light scratches or corrosion can usually be cleaned with crocus cloth. However, bores that have deep scratches or scoring may be honed, provided the diameter of the...
CLICK HERE TO GET FULL ACCESS TO Chevrolet Beretta BRAKE SERVICE PROCEDURES
FUEL FILTER REPLACEMENT PROCEDURES FOR Chevrolet Beretta AUTOMOBILES
Fuel filter replacement procedures with corresponding images for most domestic and imported Chevrolet Beretta cars and light trucks sold in the U.S. for 1980+.
General Motors Corp./Saturn Passenger Cars -> Fuel Filter Scheduled Maintenance -> 1980-06 Gasoline Engine Models Except Catera, LeMans (1988-93) Metro, Nova (1985-88), Saturn & Sprint -> Normal Service -> Severe Service
Vehicle: 1996 Chevrolet Beretta 2.2 L4 GAS
CLICK HERE TO GET FULL ACCESS TO Chevrolet Beretta FUEL FILTER REPLACEMENT PROCEDURES
DRIVELINE, U-JOINT & CV AXLES REPLACEMENT PROCEDURES FOR Chevrolet Beretta AUTOMOBILES
Includes CV axle, universal joint, and driveline replacement, for domestic and imported Chevrolet Beretta cars and light trucks from 1990+.
CV AXLE SHAFT, Replace
Vehicle: 1992 Chevrolet Beretta GTZ 3.1 V6 GAS
- Disconnect negative battery cable.
- Raise and support vehicle and remove wheel and tire assembly.
- Install drive axle seal protector J-34754 or equivalent on outer joint.
- Insert a screwdriver or drift into caliper and rotor to prevent rotor from turning and remove hub nut and washer.
- Remove lower ball joint cotter pin and nut, then loosen joint using a suitable pry bar or tool No. J-29330. If right axle is being removed, turn wheel to left, if left axle is being removed, turn wheel to right.
- Insert a prybar between suspension support...
CLICK HERE TO GET FULL ACCESS TO Chevrolet Beretta DRIVELINE, U-JOINT & CV AXLES REPLACEMENT PROCEDURES
STARTER & ALTERNATOR REPLACEMENT PROCEDURES FOR Chevrolet Beretta AUTOMOBILES
Includes starter and alternator replacement procedures for domestic and imported Chevrolet Beretta cars and light trucks from 1990+.
Alternator, Replace
Vehicle: 1992 Chevrolet Beretta GTZ 2.3 L4 GAS
- Disconnect battery ground cable.
- Disconnect electrical connections from alternator.
- Rotate or lift belt tensioner arm, using a sui...
CLICK HERE TO GET FULL ACCESS TO Chevrolet Beretta STARTER & ALTERNATOR REPLACEMENT PROCEDURES
MAINTENANCE LAMP RESET PROCEDURES FOR Chevrolet Beretta AUTOMOBILES
Maintenance lamp reset procedures with corresponding images for most domestic and imported Chevrolet Beretta cars and light trucks sold in the U.S. from 1990+.
General Motors Corp./Saturn Cars -> Check Engine Or Service Now Soon Engine Indicator Lamps (Gasoline Engines w/Electronic Engine Controls Or EFI) -> Except LeMans, Metro, Prizm, Storm & Vibe
Vehicle: 1992 Chevrolet Beretta GT 2.2 L4 GAS
The Check Engine lamp should light when the ignition is turned On. When the engine is started, the lamp should go off. If the lamp remains on for 10 seconds or constantly after the engine is started, the self diagnosis system has detected a fault condition and has stored a code in the system Electronic Control Module (ECM) or Powertrain Control Module (PCM). After diagnosis and repair, the ECM memory can be cleared of codes as follows:
On models except Cadillac with DEFI, remove the ECM/PCM fuse or disconnect the battery ground cable for approximately 30...
CLICK HERE TO GET FULL ACCESS TO Chevrolet Beretta MAINTENANCE LAMP RESET PROCEDURES
RADIATOR & HOSE REPLACEMENT PROCEDURES FOR Chevrolet Beretta AUTOMOBILES
Includes radiator, cooling and heater hose replacement procedures for domestic and imported Chevrolet Beretta cars and light trucks from 1990+
Heater Hose, Replace -> Inlet -> Outlet
Vehicle: 1992 Chevrolet Beretta 2.2 L4 GAS
Inlet
- Drain cooling system into a suitable container.
- Reposition heater hose inlet clamp at engine using hose clamp pliers.
- Remove heater inlet hose from engine.
- Reposition heater core inlet hose clamp at heater core using hose clamp pliers.
- Remove hose from vehicle.
- Reverse procedure to in...
CLICK HERE TO GET FULL ACCESS TO Chevrolet Beretta RADIATOR & HOSE REPLACEMENT PROCEDURES
SERPENTINE BELT SERVICE PROCEDURES FOR Chevrolet Beretta AUTOMOBILES
Serpentine belt replacement procedures with corresponding images for most domestic and imported Chevrolet Beretta cars and light trucks sold in the U.S. from 1990+.
Serpentine Drive Belt, Replace
Vehicle: 1995 Chevrolet Beretta 2.2 L4 GAS
CLICK HERE TO GET FULL ACCESS TO Chevrolet Beretta SERPENTINE BELT SERVICE PROCEDURES
COMPONENT LOCATION DIAGRAMS FOR Chevrolet Beretta AUTOMOBILES
Component location diagrams for most Chevrolet Beretta cars and light trucks sold in the U.S. from 1990+.
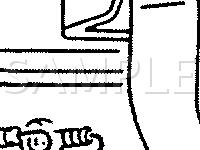 Clutch Start Switch Diagram for 1990 Chevrolet Beretta GTZ 2.3 L4 GAS Clutch Start Switch Diagram for 1990 Chevrolet Beretta GTZ 2.3 L4 GASComponents on diagram: |
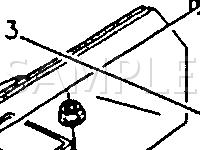 Behind LH Side Of I/P Diagram for 1996 Chevrolet Beretta 3.1 V6 GAS Behind LH Side Of I/P Diagram for 1996 Chevrolet Beretta 3.1 V6 GASComponents on diagram: |
CLICK HERE TO GET FULL ACCESS TO Chevrolet Beretta PARTS/COMPONENTS LOCATION DIAGRAMS!
WIRING DIAGRAMS FOR Chevrolet Beretta AUTOMOBILES
OEM drawn wiring diagrams for most Chevrolet Beretta cars and light trucks sold in the U.S.
 1992 Chevrolet Beretta GTZ 2.3 L4 GAS Wiring Diagram 1992 Chevrolet Beretta GTZ 2.3 L4 GAS Wiring DiagramComponents on diagram: |
 1989 Chevrolet Beretta GT 2.8 V6 GAS Wiring Diagram 1989 Chevrolet Beretta GT 2.8 V6 GAS Wiring DiagramComponents on diagram: |
CLICK HERE TO GET FULL ACCESS TO Chevrolet Beretta WIRING DIAGRAMS!
TECHNICAL SERVICE BULLETINS FOR Chevrolet Beretta AUTOMOBILES
OEM TSB listings for most Chevrolet Beretta cars and light trucks sold in the U.S. from 1985+.
|
Document: GM CAMPAIGN IDENTIFICATION LABEL - INFO Vehicle: 1995 Chevrolet Beretta 3.1 V6 GAS Auto Systems: |
|
Document: ABS MIL ON - DTC 46 AND 86 SET Vehicle: 1992 Chevrolet Beretta GT 2.2 L4 GAS Auto Systems: |
CLICK HERE TO GET FULL ACCESS TO Chevrolet Beretta TECHNICAL SERVICE BULLETINS!
COMPONENT/PARTS SPECIFICATIONS FOR Chevrolet Beretta AUTOMOBILES
BRAKE SPECIFICATIONS: Brake drum, rotor, caliper, and related specifications for most Chevrolet Beretta cars and light trucks sold in the U.S. and Canada from 1970+.
- Brake caliper mounting bolt torque
- Brake drum runout, machining, & discard specs
- Minimum brake lining thickness.
- Brake rotor runout, parallelism, machining, discard, & finish specs
A/C SYSTEM SPECIFICATIONS: Air conditioning refrigerant capacity and type as well as lubricant capacity for most Chevrolet Beretta cars and light trucks sold in the U.S. and Canada from 1980+.
- Refrigerant capacity & type, compressor oil viscosity, total system oil capacity & compressor clutch gap
COOLING SYSTEM BLEED: Cooling system bleeder valve identification, bleeder type and bleed procedures for most domestic and imported cars and light trucks sold in the U.S. and Canada from 1986+.
PREVENTIVE MAINTENANCE: Preventive maintenance recommendations and required services for most domestic and imported cars and light trucks sold in the U.S. and Canada from 1980+. Includes severe and routine service schedules
QUICK-LUBE and ILLUSTRATIONS: Fluid recommendations, capacities, drain plug torques, tire data, and severe service recommended preventive maintenance schedules. Information covers most Chevrolet Beretta cars and light trucks sold in the U.S. and Canada from 1980+. Engine and chassis service images.
- Automatic transmission/transaxles capacities, lubricant recommendations
- Differential/final drive capacities, lube recommendations, grades, & viscosities
- Final drive fill & drain plug torques
- Number of lubrication fittings & plugs
- Power steering, brake, & clutch fluid recommendations
- Manual transmission/transaxle capacities, lube recommendations, grades, & viscosities
- Number of lubrication fittings & plugs
- Power steering, brake, & clutch fluid recommendations
- Engine oil capacities, API grade recommendations, SAE viscosity recommendations, drain plug torque
- Severe service maintenance & interval recommendations
- Tire sizes, wheel nut/bolt torque, pressures & rim sizes
- Transfer case capacities, lube recommendations, grades, & viscosities
TUNE-UP & DRIVEABILITY SPECIFICATIONS: Most tune-up specifications for most Chevrolet Beretta cars and light trucks sold in the U.S. and Canada from 1980+
- Airflow sensor electrical specifications
- Tensioning specifications for systems with automatic tensioners
- Barometric pressure sensor specs
- Battery group number and cranking performance
- Crankshaft & camshaft position sensor resistance
- Engine compression pressures
- Coolant temperature sensor specs
- Computer advance.
- Diesel fuel temperature sensor resistance.
- Distributor advance specifications
- Ignition pickup coil resistance
- Exhaust gas recirculation temperature sensor resistance
- Engine fastener torque values
- Firing order diagrams
- Fuel system pressures
- Generator (alternator) specs
- Intake air temperature sensor specs
- Ignition coil specifications
- Fuel injector resistance
- Engine idle speeds
- Knock sensor resistance
- Manifold absolute pressure sensor specs
- Mixture control solenoid resistance
- Voltage regulator specs
- Spark plug applications & gaps
- Starter motor electrical specs.
- Tensioning specifications for systems without automatic tensioners
- Throttle body temperature sensor resistance
- Ignition timing in degrees at rpm
- Transmission oil temperature sensor resistance
- Throttle position sensor specs
- Vacuum sensor valve specs
CLICK HERE TO GET FULL ACCESS TO Chevrolet Beretta SPECIFICATIONS DATA!
Shop online for auto body parts, engines, wheels, lights...
| More parts |

